The camera wars
Smartphone cameras have become a decisive feature when evaluating options available in the market, and with a good reason. Their powerful imaging processing features and other cool “witchcraft” compensates the lack of more advanced hardware such as a bigger sensor, zoom capabilities or wider apertures (a lower f-number, for better images in low light conditions and that blurry-background effect), putting even mid-range phones on par with more professional mirrorless and DSLR cameras in many situations. In fact, I believe it is not possible to talk about the “phone with the best camera” anymore.

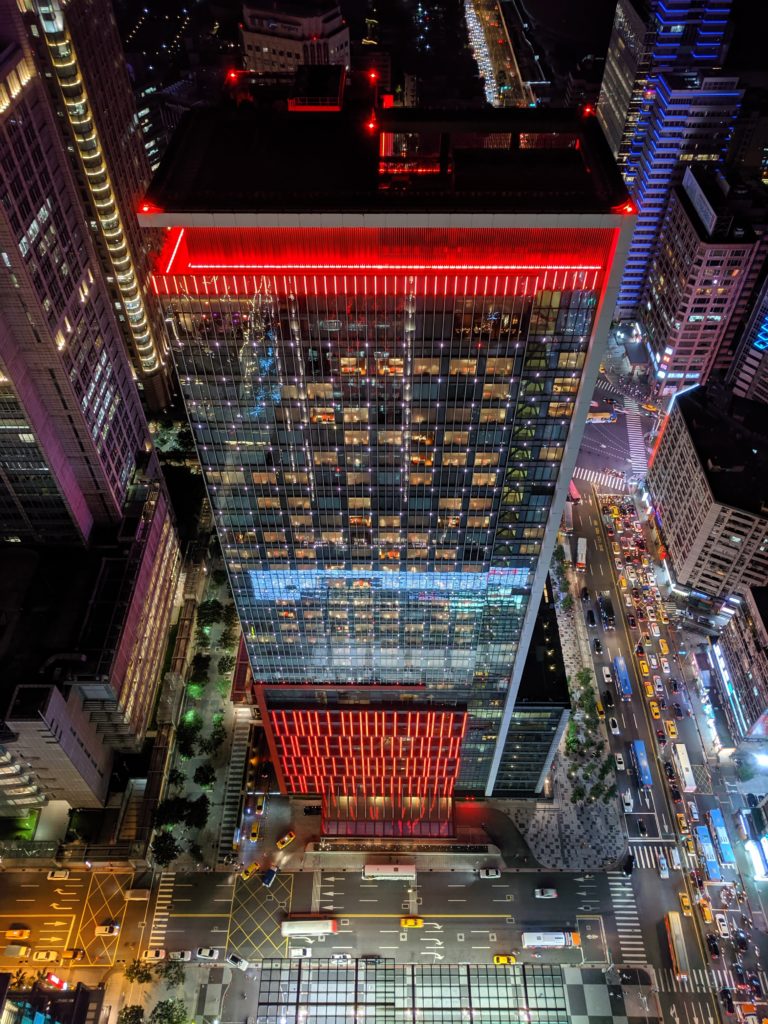
Travel (Smartphone) Photography
Who does not love to take pictures when traveling? Maybe just a few photos, if you are not a photography enthusiast, or maybe a couple of hundreds (even thousands, depending on the length of your trip), if you are into photography. The fact is that we all love to share our adventures in the shape of photos. For a backpacker, having a phone with a great camera, decent battery autonomy and enough free memory space mean a lot. All the physical space saved by not carrying at least 5 Kg of camera(s), lenses, batteries, and other accessories can make the difference between paying for checked luggage at the airport or not.

What I really regret sometimes, though, is looking at some of my pictures after a trip and finding out that they are blurry, out of focus, too dark, too bright or there are objects that came into the frame at the last moment without notice. I am sure it can be frustrating for you as well. After all, it is not like you can go back to that amazing place again so easily and recreate the moment to take that photo again.
Tips, functions and hacks
With time, I have discovered some things that have helped me to improve my smartphone photography greatly. After all, I traveled to many places only with my iPhone before I decided to take the next step and buy a mirrorless camera (yeah, one of those you can change lenses and stuff). During all those trips, I had to rely heavily on all the features available on my default camera app, and on my photography skills. Even today, whenever I do not have my “big” camera around, I apply these hacks in order to get the best out of that tiny but very capable lens. From the most basic to the less obvious, let us get to them right away!
1. Know what your phone’s camera can do
Most people do not have any clue about ISO, shutter speed and aperture, and that is just fine! Smartphones do all those technical arrangements for you. However, you will still need to master some basic settings in order to get the best results.
Below, I spend a few lines to give a simple definition of the basic functions you should know about any camera default app. They will also be useful as you keep reading further:
- Timer: delays the shutter release. Most phones have a short (2 or 3 seconds) and long timer (10 or 12 seconds).
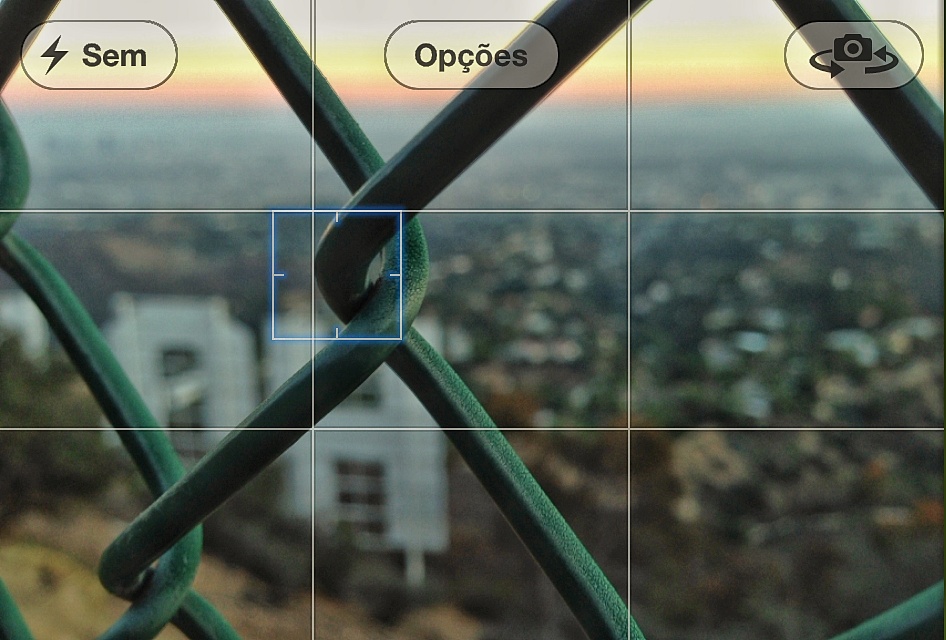
- Focus: as soon as you activate the camera, the focus point will be marked by a square or a circle on the screen (the shape depends on the camera app). This is the specific area of your picture, where the camera is “putting its eyes on”.
- Exposure: the vertical metered bar on the screen. A small sun icon appears showing the level of exposure (in short, the level of brightness). In some phones, this bar appears only after the screen is touched for refocusing.
- Flash: designed to greatly improve the low light conditions, it illuminates the frame at the moment of snapping the photo.
- Zoom: this is the function that allows you to bring your subject closer when it is too far or unreachable. Most recent phones use a mix of software and hardware (multiple cameras) to improve the imaging quality when zooming in. Pinch in or pinch out accordingly.
- Activate the camera with the locked screen: this shortcut will save you precious time when the opportunity to snap a photo only last a few seconds.
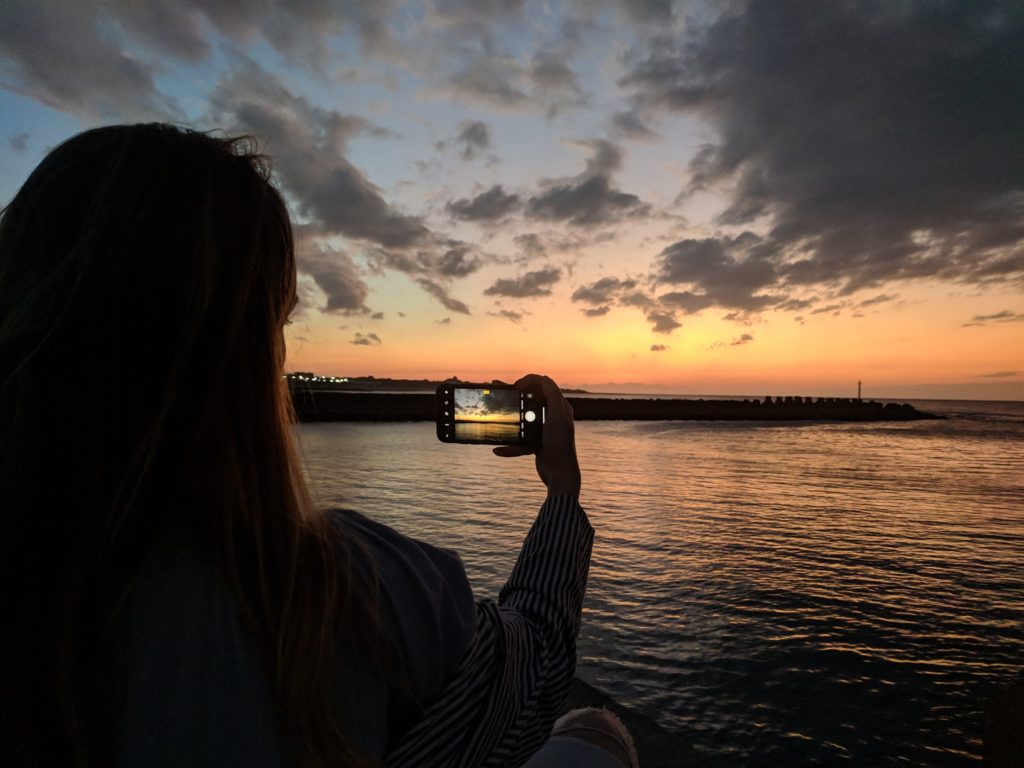
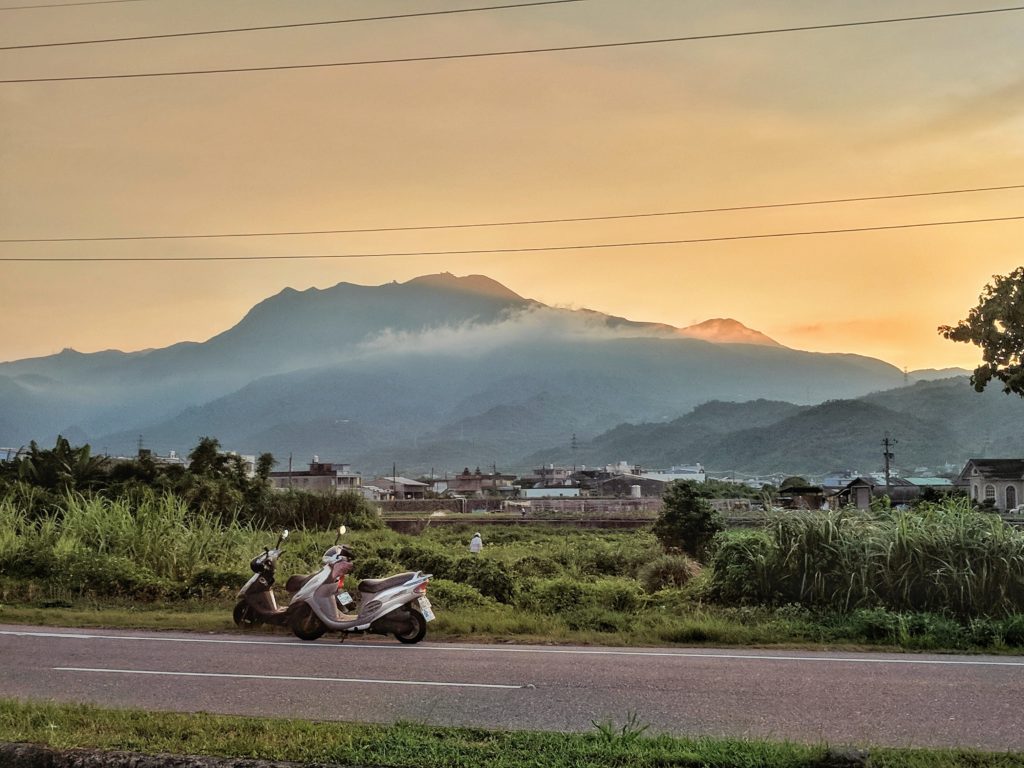
2. Identify your light source and use it in your favor
If you (the photographer) are facing against the light source, undoubtedly your photo will be underexposed (too dark) or overexposed (too bright). This is because the camera will have a hard time deciding what to focus on, either the subject, increasing the exposure, or the light source/background, decreasing the exposure. Either result is undesirable. Thus, whether it is the sun or another artificial light source, make sure your subject is against it, not you. Be careful, though, to not get your own shadow into your frame.

3. Touch the screen for focus and correct light exposure
As I said above, the camera automatically focuses on something as soon as it is activated. However, it does not mean that it is focusing on where you want it to. In order to make sure it is focusing on the right object, touch the screen wherever you want the lens to refocus. Once this is done, the focus circle or square will move to that position. The camera will also automatically set what it considers the most suitable the exposure level for your subject, but you can still swipe up or down to make further adjustments to that exposure level.
Most smartphone cameras these days have a face-detection feature. So when you are photographing people, you know it is going to be a good portrait if the focus square/circle is on the face of your subject.
4. Stay still…very still
I mean it. I have seen so many people just opening their camera app and shoot…just too carelessly. They even tilt the phone forwards when pressing that white shutter button. This results in a blurry photo, even in situations with good light conditions. So, this hack is very simple: just like your eyes when you go from dark to bright, or the other way around, give your camera a few seconds to adapt to the lighting situation of your frame. Then, press the shutter button holding your phone as steady as possible.
If you have your headphones at hand, you can also take advantage of a nice feature available when you connect them. The “+” or “-“ buttons of your headphones work as a shutter release cable, allowing you to take pictures without having to touch the screen. This way you make sure to not tilt the phone forwards at the very last moment. If you do not have a pair of headphones, the next best thing is to set the lowest timer (usually two seconds) so you can hold your phone still when it takes the photo (works amazing for selfies too!).
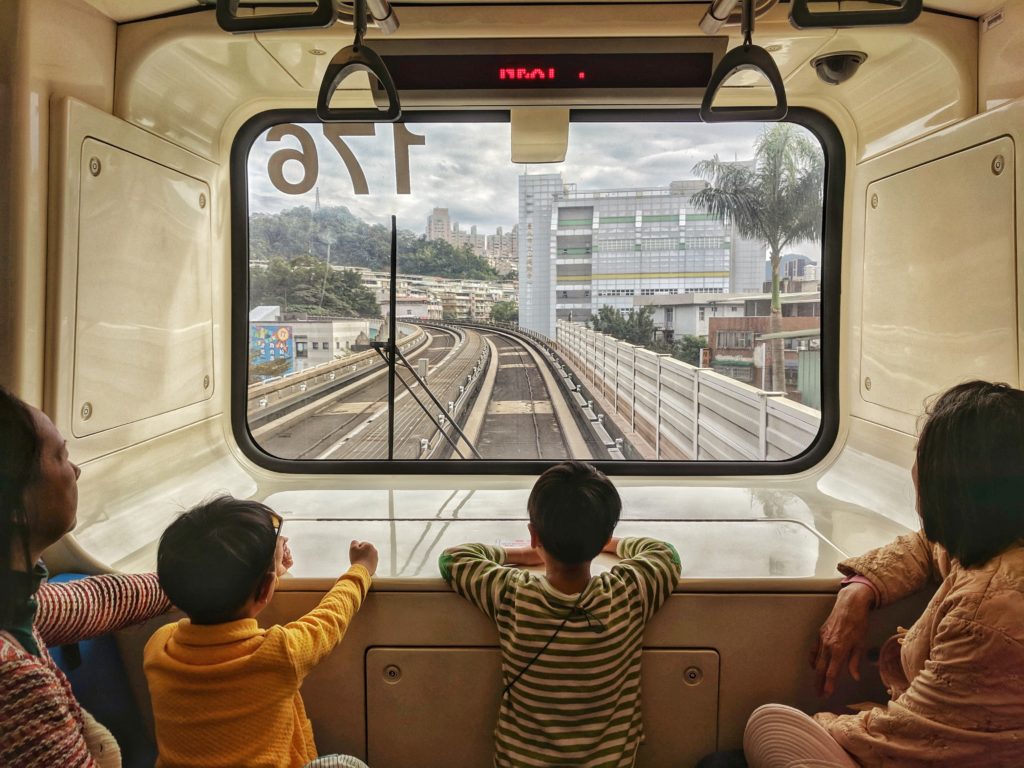
5. Use the grid to frame your subject properly (use the rule of thirds)
Every smartphone camera has a grid option that draws two equally-spaced vertical, and two equally-spaced horizontal guidelines, dividing the screen into nine (3×3) blocks. Activate it. This will help you take straight shots, not tilted ones that you will need to rotate later, cropping the edges, and making your photo smaller.
Once you have the 3×3 grid on, find straight, horizontal or vertical reference points in the frame, such as the horizon on the ocean, or the edge of a building. If one of those lines of your frame is aligned with one of the lines of the grid, you can be sure the picture is well squared.
Furthermore, the popular rule of thirds composition technique is easier to apply as well. Since the screen is divided into three vertical and three horizontal areas, instead of placing your subject right in the center, try to place it where two of these lines intersect to create a more fluid and interesting image. If the horizon is on sight, it should sit at the lower horizontal line to avoid splitting the whole image in two. There are complete books and research made about this technique, but my objective here is just to point out that you can start creating very interesting compositions like a professional using the grid.
6. Activate the HDR feature
One of my favorite functions. The High Dynamic Range (HDR) feature makes the camera take several shots of the same subject very fast when the shutter button is pressed, but with different exposures, and then it fuses them together. The results are truly stunning. In other words, this function will reduce your photo’s dark areas and the excess of brightness as well. It is the attempt of the lens to get as close as possible to how human eyes can see in terms of coloring and exposure to the light. Adverse conditions have become less challenging with the ever-improving HDR function. Personally, I have seen exceptional results when using HDR during the sunrise and sunset.
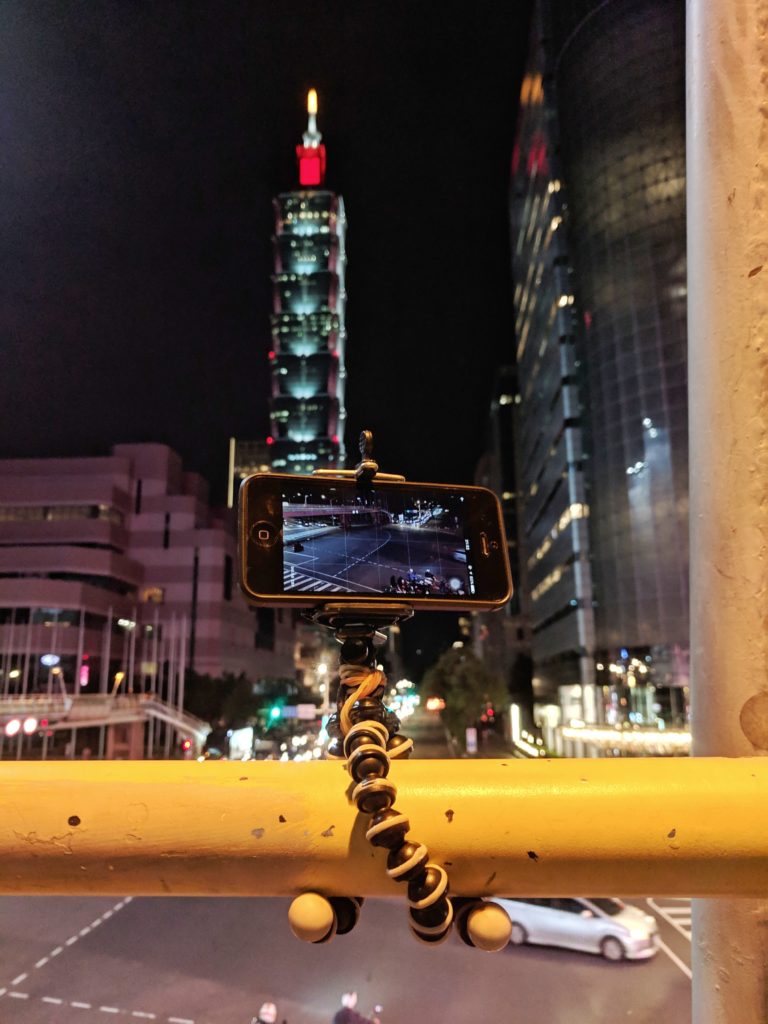
7. Get a tripod
Yes, yes, the word “tripod” can sound too geeky for some, but honestly, it is quite useful for many situations, from low light conditions to group pictures (with you in them). It definitely does not have to be a pro-level device. As long as it can hold the phone steady in portrait and landscape position, it will be enough. In these modern times we live in, any 3C store should have some affordable and pocket options from which to choose. A phone tripod can be packed in any bag and deployed fast enough for the action, so there is no valid excuse to not have one, especially when traveling. So, what do you get by having a tripod?
- It is possible to take better selfies from afar, with that beautiful landscape on the back, either you are with others or alone. Attach the phone on the tripod, find a steady ground to put it on, arrange your frame, set the timer and you are good to go.
- Have you ever wondered why photos usually look “grainy” or blurry when taken before sunrise, after sunset, during the night or under dim lighting? This is because in general, low light and cameras are not good friends. Given these conditions, when you press the shutter button, the camera will take more time to let as much light get into its sensor as possible (slow shutter speed), but by doing so it becomes significantly more sensitive to movement. No matter how steady your hands are, holding the phone by yourself will always generate undesired blurriness (aka “noise”). To tackle this issue, a tripod is needed. Perfectly sharp slow shutter photos can only be achieved by keeping the camera rock-steady.
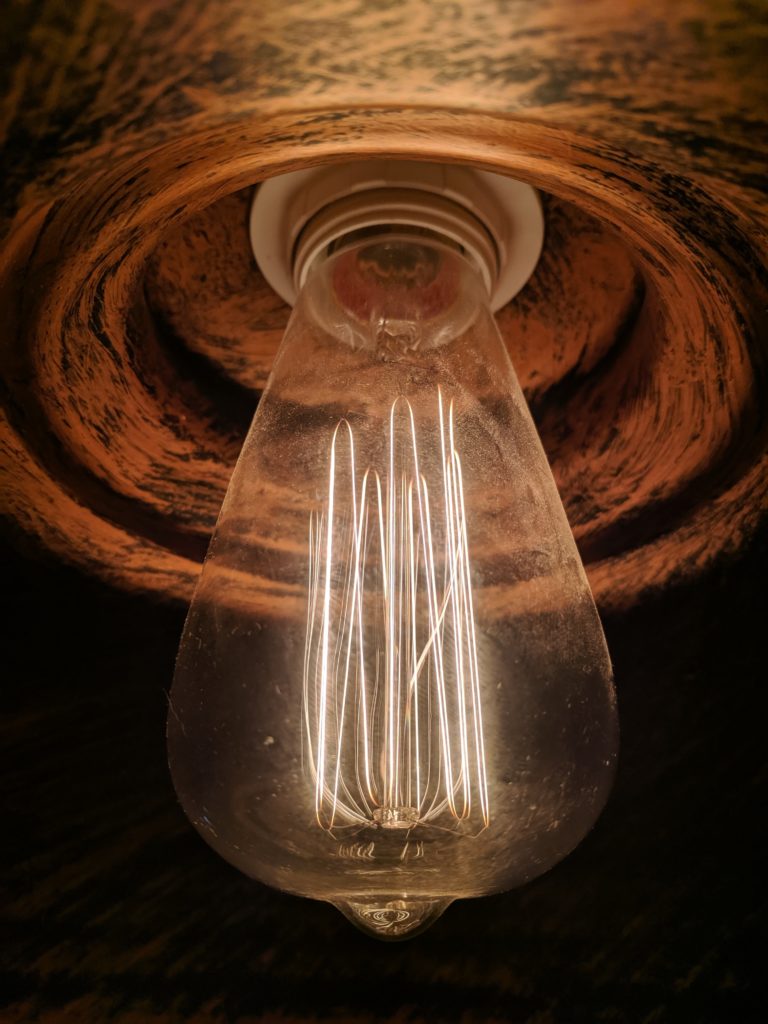
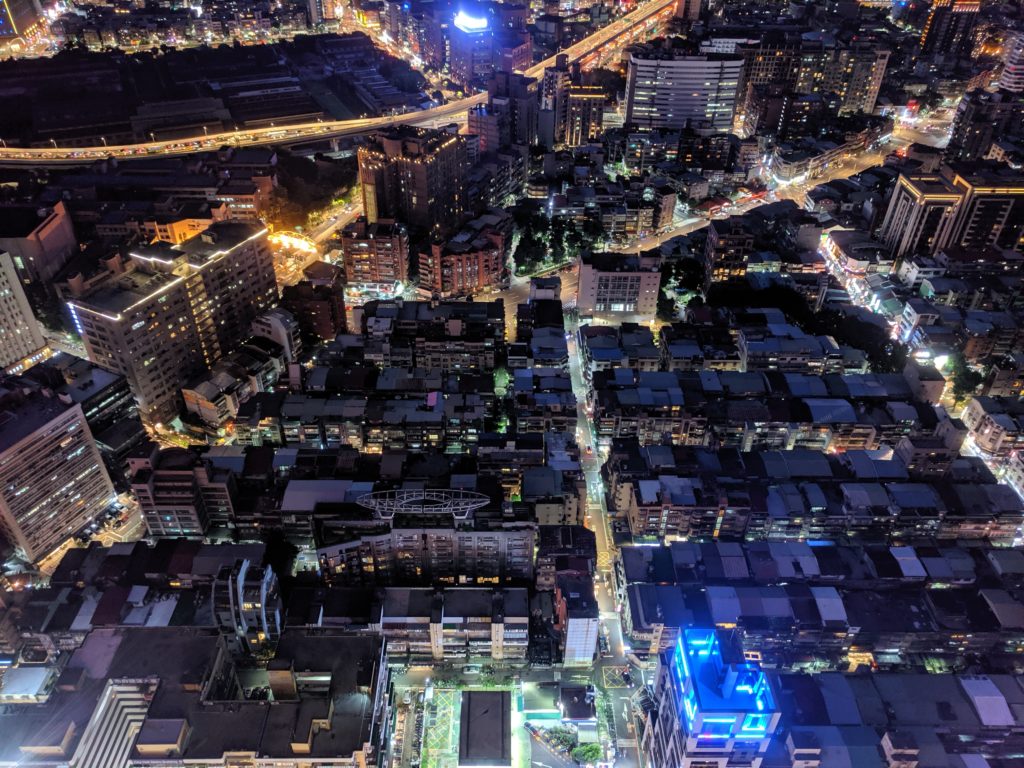
8. Activate the Night Vision feature
Since this feature came out a couple of years ago, I never take night pictures without it. It is an enhancement of the slow shutter capabilities of the camera. As its name suggests, this feature takes advantage of the most recent hardware technology and AI imaging algorithms to make some impossible shots with (really) low light a reality, even without a tripod! The key is to hold the camera as steady as possible. I need to insist, though, based on my experience, that best results are still achieved with the steadiness of a tripod.
As I said at the beginning of this article, currently there is a fierce battle between phones brands regarding which delivers the best results when it comes to photography, and this, of course, includes low-light shots. As far as my knowledge goes, so far this feature is available in devices with the most recent Android OS installed. We are still waiting for this technology to be available for iOS devices.
9. Take only one picture
Well…maybe two or three at most! Do you take more than five identical pictures of the same subject when you photograph? As you improve your photography skills, you will also start to value your device’s memory space, battery life, and the considerable time you will spend later comparing among virtually equal pictures, and then deciding which one to keep.
This tip is aimed to save you time after taking your pictures. If you take into account all the previous tips, you will find no reason to take several pictures of the same subject, angle, and setting, because you will know how to get it right at the first or second time. It will become a matter of waiting for the right moment to snap the shutter button.
As Master Yoda would say (hello there, Star Wars fans!): “Do or do not. There is no try”.
10. Consider learning how to use an image editor software
Last and least. On one side, editing software or apps compensate for the shortcomings of the camera or/and the photographer. On the other, they provide a wider room for creativity. Beware, though, to use the software as an excuse to take less-than-great photos. Besides, there is a downside. Image editing requires lots of time sitting in front of a computer screen, or immerse in your phone “fixing” your photos.
Therefore, my recommendation is to focus on improving your photography skills and knowing your camera. If a picture is taken properly, you will only require the use of software for minor adjustments, such as some color correction, exposure adjustment or applying a specific filter. All of which can be done in a relatively short time.
Final comments
Taking better pictures with your smartphone takes time and lots of practice. If you read all the way to this point, my guess is that you are already putting effort to improve your technique, and some of these tips, functions, and hacks are familiar to you. So, do not be discouraged at the sight of some people carrying a bulky, fancy interchangeable lens camera (trust me, some them barely know what they are doing). Instead, take courage by appreciating the pictures in this article. I took all of them with my phone.

You do not need the latest camera to be a great photographer. Remember, cameras come and go, but the best camera is the one you have with you at any time.